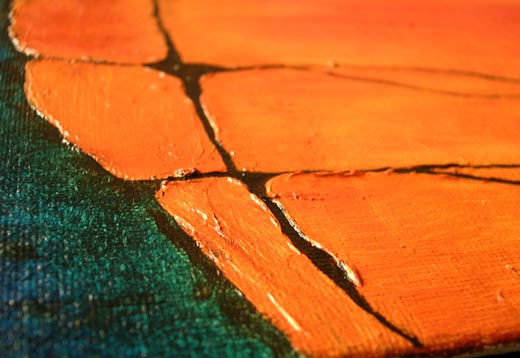
Nature inspireds one and all in its resilient ways. From magnificiant and expansive landscapes to the minute details of an atom, there is inspiration all around. When ever I see an empty canvas, the are visions of endless landscapes, bursting skies, and all the possibilities of what colors can be.
Geological formations are inspiring and humbling. They offer a lot more than what a man can behold in his senses. There are stunning moments, astonishing colors, amazing formations, abstract concepts and composition, rare textures and hues, and so much more. How much can a poor human eye behold: And how much can the body take in the experience.
Most of my abstracts revolve around rocks, gemstones, and deepscapes. This tutorial is for all my friends who have asked for the technique I use. I hope it helps you in painting wild.
Here are my step-by-step directions for making a 3-canvas (triptych) oil painting in geologic series.
Basic Art Supplies – at a glance
> Square canvases (these could be in any number, shape or size as per your requirement and imagination).
> Paints in chosen colors (could be oils or acrylic media, depending on your style and liking).
> Brushes – that you are comfortable with – few flat, rounded and few fine.
> Modelling Paste or Gesso – a good quality one. And a knife to work with it.
> Some tissue paper/ cloth/ rags for cleaning up or conjuring interesting textures.
Align the Three Canvas for a Triptych
Arrange your three or four or five canvas in a line. There are no fixed rules to keeping it horizontal. Place them where you feel it fit. Some abstracts call for uneven arrangement or in step-like fashion. For this tutorial, I am aligning the 3 canvas in a straight line.
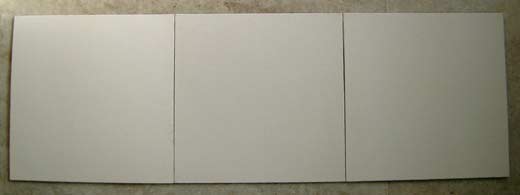
Sketch Rough Design on Canvas
This tutorial is about geological abstract, so I chose to focus on rocks and deep earth, against the sky. Draw a freehand landscape. Dont worry about lines and form… for as you move along, the design will take shape. You can also refer to any rock photographs, gemstones in your jewellery collection, etc., to draw a basic rough outline for your abstract work.
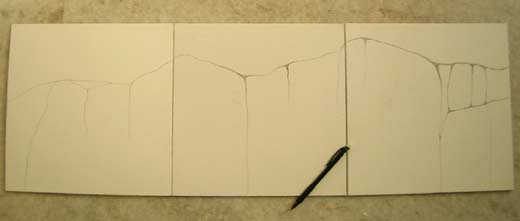
Keep your pencil work light for it is only to give you a rough idea for further work and layers that you build. Design improvisations will happen as you proceed.
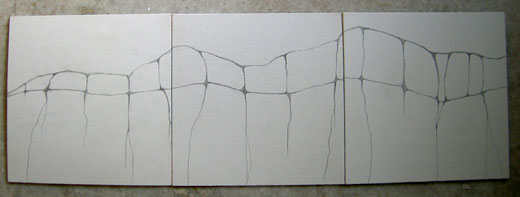
My rough sketch for this geologic formation is outlined. This overall rough sketch can give us a fair idea on how to proceed. If you are fan of thick paints, you will know for sure where you want to add texture and where you can leave it flat. In this case, I chose the rocky part. And also chose to build in the texture with modelling paste.
Use Modelling Paste or Gesso to Build Painting Texture
Use gesso or acrylic modelling paste for building in texture into your painting. Squirt the paste or scoop it out with palette knife and model it within the drawn outline.
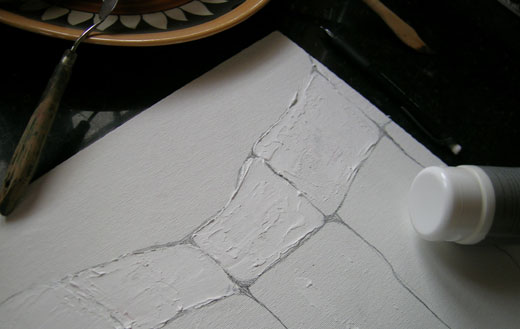
For each rock, treat it separately and build the texture for the entire earth component of the painting. Dont think too much. Just let your knife feel the rock you create.
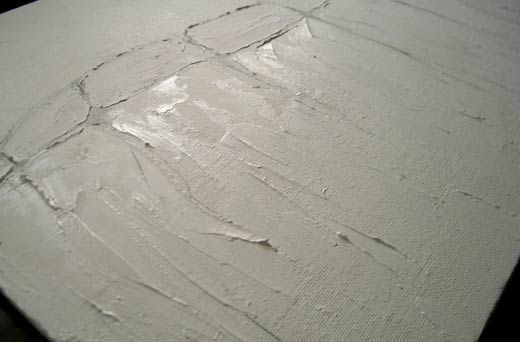
You can chose to keep the central rocks heavy and taper it down as the rocks go deep. Or make a dense texture with palette knife in strokes, cuts, dabs, etc. Experiment with textures. There will be a lot of ‘eureka’ moments of sheer joy as new unexpected textures build along.
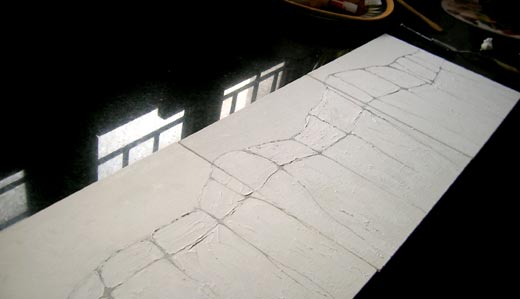
Note that acrylic modelling paste does not go well with oil paints and vice versa. If you are using acrylic colors, its safe to use the paste. Else, try gesso. This is in the long term preservation interest of your painting.
Fill the Textured Areas with Colors
Now come the earthy tones to fill the rocky lanscape. I have chosen reds, ochres, mauve, and browns to blend to give an uneven color palette. I first filled in the top rocks and smudged the same colors down to ensure continuity. The bottom half will follow the same color pattern but will have shades and character of its own.
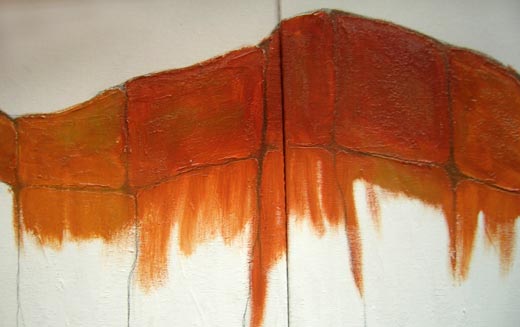
You can also opt for earmarking each square canvas with one single color and make it stand out. For example, in the photo above, one of my canvas has mauve/ purple as a dominant color. But I connect the color with its neighbouring canvas to ensure connection and connectivity.
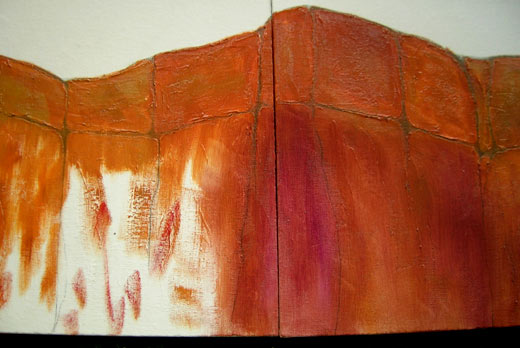
Be wild in playing with colors. Remember, you are making an absract piece of art. There are no rules… and guidance comes from another realm. You wont rest till you get it right.
Attention to Details with Fine Brush Work
Once the earthy colors are filled in, it is easy to focus on the rock details such as highlights and shadows, if you want to. By highlighting or burning/ darkening certain areas or angles on the canvas, you get a much deeper painting. It suggests angles and adds more depth to the crevices.
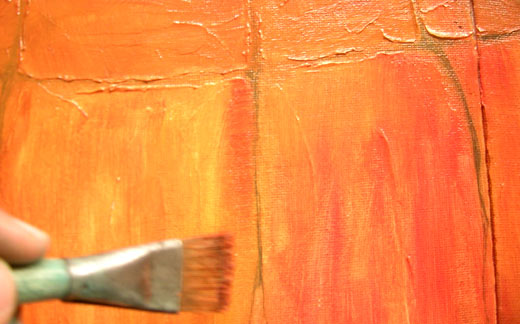
Take a look at the three canvases from far and see how much detail you would like to fill in or tone down. Add darker shades of the color near the outlines.
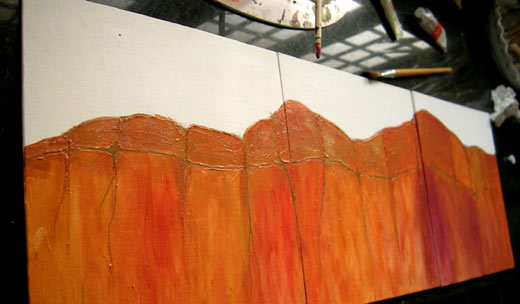
This is a great time to take a break. There wont be anymore of the fiery reds and oranges to work with. The next step is to balance the painting with other colors and fine details.
Fill in the other half with opposite colors or cool palette
The other half of this painting is the cool palette – with fiery reds matched with cool blues. There is no strict rule to using colors.
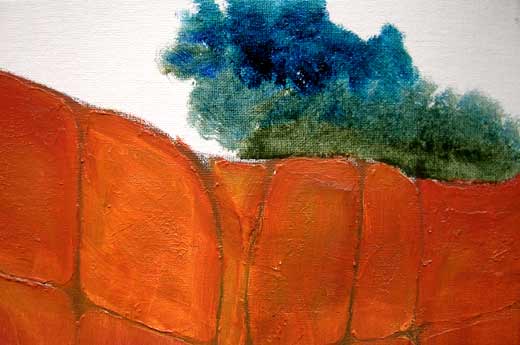
Fill in green and blue layers suggesting the flora and the skies. These colors strike a good balance to the painting. They are so vivid by themselves and they also make the dramatic stones stand out.
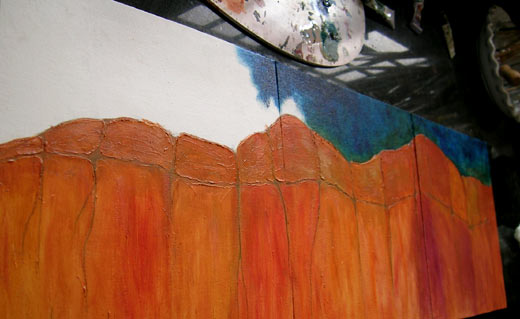
Continue to fill in the colors, canvas-by-canvas, ensuring continuity in design.
Leave it to dry. This is a great stage to make corrections or improvisations. While the colors are drying, you can use a dry brush to blend the colors better (since I am using oils).
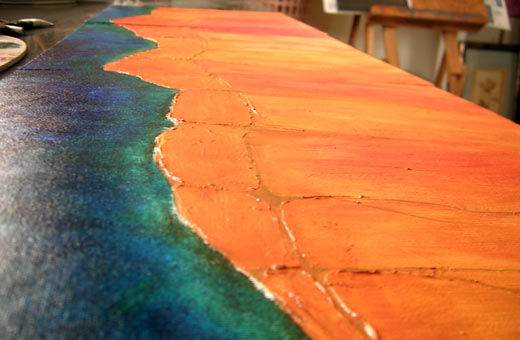
Take a look at the painting from a distance and see if you can get more out of it. Are you happy with its colors and composition? Do you want to add some more detail? Do you want to tone it down a bit? How will it look when framed? Etc.
Use Fine Brush for Detailing the Rock Crevices
Here starts the fine art bit. The rocks, crevices and fissures need to be highlighted and well-demarcated.
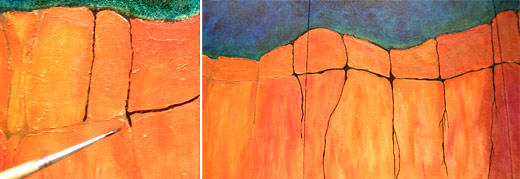
The pencils outlines made at the sketching stage will give you a good idea of where to fill in this dark colors such as the ivory black or burnt umber colors or mixture of both. Fill in dark shades/ black in between the rocks to show crevices.
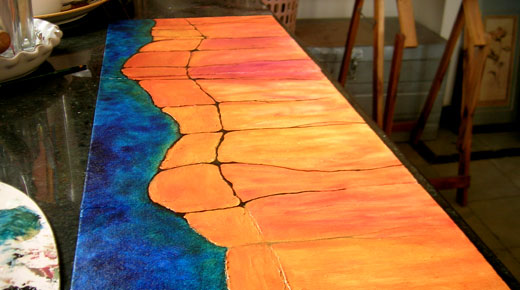
Again, you need not be too careful because rock crevices are not fine lines but branching fissures. Take care to form a consistent branching pattern (i.e., you cant have fissures going upward or branching upward if your rock crevices are running deep down) or just dont care about it. It is upto you.
Final Review of the Abstract Geologic Painting on Triptych
And here it is. The completed tryptich of a geological abstract, ready for a final look from far and close.
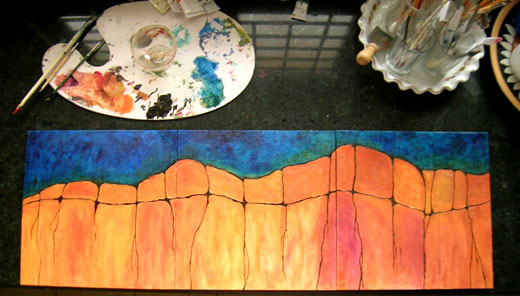
Stand from a distance and look at it as a whole. You alone can decide if it is completed or not.
Then go canvas by canvas inspecting each element in detail. There are chances that you will find a stray brush stroke, or a fallen brush hair, wrong color, etc., on the canvas that need to be corrected. This is the best time to make the corrections before your painting starts to dry.
Sign on one or all the canvases.
Let the painting dry in a dust free area.
Enjoy it as it dries.
Framing the Painting
Frame your work of art only after it is fully dry. Acrylics do not take too much time whereas oils will dry in few weeks. It is also necessary to let the paintings dry thoroughly before applying a coat of varnish or polish.
If you had done this painting on a box type stretched canvas, you could extent the paint around the sides and hang it to dry.
MY NOTES:
Way back, abstract art was considered absurd art. Thankfully, not anymore. Thanks to the internet, we artists now get to see so much varied art all around that it gives us a sense of relief for not being alone in this. That there are so many around, doing new things, following their visions and hearts, and translating life on canvas. Without a care.
I often did geologic abstracts but one artist who revived my fervor for the rocks is Carol Nelson. Her geologic abstracts made me get back to these earthy wonders with greater enthusiasm. Her paintings are inspiring – to say the least and so is the idea to make this tutorial.
Deep earth and vast universe has been my eternal fascination, for as long as I can remember. Geological concepts, fine details in the gemstones, mineral deposits, trace elements, satellite photos of the earth terrain, and countless marvels of nature, never cease to amaze me. Most of my early paintings were abstracts that always had the earth element. No matter how much I paint, I will always find peace in the deep-scapes.
I had done many geologic abstracts and have enjoyed every moment of them. Some of my gemstone series, such as the Lapiz Lazuli and Moonstone Rose Quartz, have been used for jewellery display backgrounds in a boutique. Those small square paintings remain my eternal favorites.
Art is but a celebration of all that is around, in abundance. If you feel like painting – just do it, for it is the language of communication since the time of man.
If this tutorial has helped you in any way, please let me know…. for I would be happy to have this communion with you.
PS: The comments are closed for this post as I am getting too much spam here. If you have something to say, please leave your comments on any other page on WanderingMist and I will get back to you.




Thank you so much for sharing this with us. You made this very easy to understand, and I came out with a painting I am proud of!
I like your blog very much, and am eagerly awaiting more painting tutorials!
Cool blog! Is your theme custom made or did you download it from somewhere? A theme like yours with a few simple adjustements would really make my blog jump out. Please let me know where you got your theme. Appreciate it
this is perfect. you came to me at just the right time. i’ve been wanting to try absrtact and i also love minerals! how inspiring! thank you!
Useful article can i translate into German for my blogs subscribers? Thanks
I find myself coming to your blog more and more often to the point where my visits are almost daily now!
Very informative post. Thanks for taking the time to share your view with us.
I’ve been visiting your blog for a while now and I always find a gem in your new posts. Thanks for sharing.
Very informative post. Thanks for taking the time to share your view with us.
Great information! I’ve been looking for something like this for a while now. Thanks!
found your site on del.icio.us today and really liked it.. i bookmarked it and will be back to check it out some more later
Valuable info. Lucky me I found your site by accident, I bookmarked it.
found your site on del.icio.us today and really liked it.. i bookmarked it and will be back to check it out some more later
Thanks a ton for this tutorial… Very helpful. I am book marking it, hoping to be brave enough to try out one after I complete my current unfinished projects.
I have a new post on my blog on the garden flowers. Do check it out 🙂
Do try it, Iniyaal.
Once you reach a certain level of comfort, I will let you know of more details and techniques you can add to this painting. For example, you can add more colors and make it vibrant, give a final raw umber wash for greater finish, etc.
Let me know how your painting turned out to be.
Thank you for the link. I think your demo is very good. You’ve covered the basics perfectly.
Carol
So glad to have you here, Carol. You will always remain my inspiration.
Damn Good 🙂
waiting to do something like this in a few wks 🙂
Eva: Why few weeks? Just start right away.
Just do it.
Ishrath , wonderful post and have been waiting for such a post from you….so very informative and Thank you very much for sharing it with us…
Just Around Me: This one is for you for you too. Hope to see you paint once again.